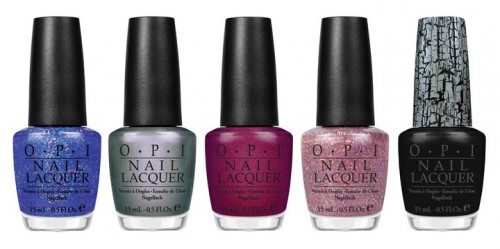
After my last nailpolish post, I learned you guys love nailpolish- just like me!! :D hehe...so, this is another one about OPI shatter.
You may have heard about this "new" nailpolish with the name crackle, shatter, crackling, or something else :P basically it's nailpolish that CrAcKs over another color, giving a very cool look.
I wanted this for a long time...but it was constantly out of stock everywhere! I finally found it at ULTA a couple weeks ago, and now it's out of stock again. :P China Glaze has a shatter line also, called "crackle". They have more colors than Opi (Opi only has a black shatter/crackle color, the rest are normal nailpolishes)
I got my hands on the OPI one, so that's what i'm "reviewing" today. :) Crackle is supposed to come out with more colors this summer, so if I can get hold of it I might review it too later this year :)
Putting this nailpolish on takes some effort for me, because you need a base color, shatter color, then top coat. (some people apply a base coat too, I didn't) Also, I'm not a very talented nailpolish applier so this took me several tries.
When i first got it I tried it out right away and it turned out HORRIBLE. (that's what the picture is from) I put it on too thick so it didn't break up much, which just looked weird.
When I did it today, my sister managed to do one of my nails perfectly on first try. And out of my 9 remaining nails, I ended up having to do 5 of the nails again...and 1 of them 3 times. :D hehe yes I'm not too good at this :P
I suppose I'll show this in steps (so much to say it's confusing how to put it!:P)
Step 1: Base color
 |
| It's hard to get a complete picture with uneven fingers :P |
 |
| Nailpolish colors used! |
 |
| my window ledge :P |
Step 2: Shatter! (the second picture is in process of shattering- it literally takes seconds!!)
 |
| Shatter Nailpolish! |
 |
| In process of shattering! |
 |
| Completely shattered |
 |
| before top coat |
 |
| with top coat!! shiny!! :) |
 |
| top coat used...Sally Hansen Strengthening Topcoat |
How's it look? When I re-did several of my nails, all 3 layers came off super easily. :)
Here's the enamel I used specifically:
 |
| Sephora OPI Go with the Flow-er |
 |
| OPI Black Shatter |
 |
| Rimmel London Green with Envy |
 |
| this is the nail from step 2 with a top coat! :) |
 |
| this is from my webcam...so it's blurry :P heehee |
that's it! :) hope you liked it... if you want shatter and/or crackle, hurry! because these are running out everywhere! :)
If you want to know more about the process, search OPI shatter or China Glaze crackle on youtube-- there are lots of videos on how the "paint drys" :P but seriously- it is a QUICK process!!!
lastly- as i was taking this pictures my sister and her friend were getting ready for a party, and my sister goes, "why are you taking pictures of your nails?" and i'm like, " i have to blog about it!!" hehe
hope you have a lovely day INSHALLAH! :)
-LC :)


Oh my, I've never heard about crackling nail polishes before; this seem so fascinating! I'm glad you posted the step-by-step pictures, otherwise I was totally lost :D Thank you!
ReplyDeleteHehe your welcome!! :) It's such a fun way to mix up nailpolish styles :D
ReplyDeleteCrackling nail polish? Wow! Thanks a lot for all the pictures, I especially like the the 4th pic from the last...I wonder whether it's smooth though?
ReplyDeleteYour welcome-- the best way to show this amazing enamel was with pics!
ReplyDeleteAbout the smoothness- it depends. When I applied the top coat it went up & down according to the crackle. It's smooth as in texture but it's...bumpy? Not rough (at least with a top coat) but surely bumpy/up&down.