Sunday, October 20, 2013

Baby Nephews! :)

It's been a while since last post! Last year of High School is very busy and I also acquired (haha, I can't think of another verb for this) two nephews in the past 2ish weeks!! 
Nephew #2 basinet label, who was born on Eid ul Adha! :) 

My sister and sister-in-law both had boys 11 days apart. Since I'm on fall break this past week and upcoming week, it's been fun to spend time with my sister's son! :) (I think he likes me. We'll pretend 2 week olds can express affection to their aunts)

I finally bought a few things for my nephews! We were at Target today and I liked a few onesies. I should probably get my older nephew Mr. Potato Head like I've been wanting to to keep it even :p (my sister think that's the worst present on Earth, I'm positive it's America's classic toy for a reason...)


My sis-in-law's son is a little brother to my 2 year old nephew! :)

My favorite! I got one of these for both of them

For sister's son :)

The fun thing is (not that I was intending to be a super cheap aunt or anything :p) while I was looking around a Target employee told me about Target's Cartwheel app that I downloaded right then and there (yay wifi!) and found sales on these clothes! The app is pretty nice...I don't shop at Target THAT often, but it seems like you can almost always find a coupon for the things you're shopping for (especially with all the baby stuff my sister will be getting now).

I have lots of pictures of me nephews, not their things as much. But I think I'll do a picture review post after this of some random things :)

Tuesday, July 2, 2013

Pinterest Straw Nail Fail

So this will be a little different than most of nail posts because actually it's a big 'ole failure. haha...my sister would say this post describes me perfectly because I fail at a lot of things :p

I saw this pin the other day while on Pinterest, and I didn't even pin it, thinking it was so simple I could surely do it one day! (okay, it wasn't this exact pin but same idea)


I hadn't seen this exact pin, so when I sat down to it I had the brilliant idea of doing red and blue nail polish for 4th of July coming up soon (American Independence day...is that common international knowledge?). Really brilliant unique idea, ya know? :p I'm sure nobody else has thought of that.

The first fail came in through, though, when I realized the only blue I have is teal. I've used it on this blog before...looks like this
left one is the closest thing to blue I own...yay
Oh well, not a big deal right? I grabbed two sizes of straws and even some silver nail polish to add a fun sparkly flair to it.

First, white base. Which, by the way, looks a little creepy on its own. (these are my room colors, I thought it would make a fun picture)

Now time for the straws! First of all, you aren't supposed to DIP your straw into the nail polish. That will result in a blob of nail polish. So I started brushing it on the straw and then putting it on my nail. A little, tiny bit better. 
...but not really (sorry about the quality)
Okay, the blue wasn't even really blue to start off with. Maybe the red will look nicer?
nope. 
I'm kindda stubborn about doing my nails. Well I'm actually pretty "kindda stubborn" about most things, so I kept doing these although I was pretty well aware that it was a really big failure.
At one point I just started putting blobs down...might as well purposely make it look more messy
As I my friend said, "hahaha wow. That's....pretty bad"

So it's kindda hard to tell, but I think the silver (which I used the bigger straw with) actually ended up more like a circle. Maybe I shouldve just used the big straw. But the picture surely uses a small straw. So i'm not quite 100% sure what i did wrong to mess up on the easiest nail tutorial EVER. :D
I thought this picture wasn't clear enough, and it surely looks a tad bit nicer if you can see that I did get SOME circles

nah....still looks terrible
haha. 
I think I'll change it to my nails alternating solid red white and blue tomorrow. :) That shouldn't be too hard...

Monday, July 1, 2013

DIY Scratch-Off Fundraiser

Every year my high school does a fundraiser event called a "Dance Marathon" (DM) for our local children's hospital. It involves eating, playing games, dunking teachers, a bit of organized dancing, and just having a really good time with friends while working for a good cause. We spend all year planning out this event and do tiny things along the way to help raise as much money as possible. One of those "tiny" things includes promoting the clubs in the school to do their own small thing for the DM, whether that means making tie-blankets for the hospital or raising money through their own mini-fundraiser.

One of the clubs that I help out with is Health Professionals of Tomorrow (HPT). The officers of HPT sat down and brainstormed many different ideas on how to do our own little fundraiser, and had our members vote on their favorite one. Having a scratch-off fundraiser won, which led to this fun DIY project :)


What exactly is a scratch-off fundraiser? A scratch off fundraiser involved a card that has money amounts hidden under a scratch off surface. Donors scratch off a spot and donate the amount shown. Sometimes you can make it more reward based and give a candy for every donation. It's just a more fun way to raise money.

Is this the only way to do a Scratch-Off Fundraiser? Nope, not at all. There's plenty of companies that would LOVE to help you do this by having you pay for it. :D Companies likes Skratchers and this site. Skratchers will even send you a free sample. While the sites are faster, in my opinion they are SUPER expensive and not really customizable to your specific fundraiser.

So how do you do it yourself? 

1. Get some supplies. You'll need acrylic paints, dish soap, tape (or a laminating machine, or white crayons), and paper (preferably cardstock).
2. Create a card design. This is where you get to make your fundraiser however you'd like it. I did mine on word, with one inch circles being the scratch off spot, inside which were rectangles with the money amount. Each card added up to $25 and had 24 spots ranging from $0.50 to $2.00 (so whatever the donor scratched, it was not an outrageous amount). And unlike what some people thought, there were way more $0.50 spots than $2.00.
What the word document looks like. This a little smaller than half a page in landscape mode
 3. Print your card design on cardstock or whatever paper you chose. Cut out the cards.
cutting these out was probably my least favorite part ....
4. Here's where you create a barrier between the paint and paper so the scratch-off doesn't ruin what's written underneath. There are many ways to go about this. You can run your cards through a laminating machine, if you have one. I've READ you can color in the money amount with a white crayon, but this is not tested by me (my paper wasn't all white, as you can see above, so it wouldn't have worked as well). What I chose to do is cover the cards with big packing tape. This basically laminated the cards AND made them more sturdy and nice looking :)
Tape I used
5. Time to paint! The rule is to have two parts paint for every one part dish soap. This isn't a hard and fast rule- I estimated for all the ones I did and they turned out fine. The cool thing is- you can use ANY color and even do designs, something you wouldn't get with online ordered ones. Below are some designs I did.
you can see the rainbow array of paints on the side

in between painting :)

And that's it! :) Here are some optional things that I did to facilitate this whole process:

*I attached envelopes on the back of all the cards for members to put the money inside. 
*There was a little sheet inside the envelope that explained the purpose of raising money for the hospital and all the good the hospital did.
*To make it more fun and involved, we had members actually paint their own card during a meeting. That way, everyone got to chose their own colors and make it their own and have fun with it. Plus, it saved a TON of time for me, since I only colored enough for people who didn't attend the meeting/example purposes. 
*We suggested that people can make this more exciting by creating some sort of game with the scratching off or  giving a piece of candy to every donor (a bag of 20-30 piece "fun-size" candy bars is only $2-3). The candy incentive seemed to pull a lot of donors.

At the end, we raised $609.24 through this fundraiser, so it DOES work. Most people in the club didn't actually finish their cards, but it evened out with some very generous extra donations. The cards help introduce the cause and initiate a good starting donation price. And you can always increase the amount of spots or money in each spot. Obviously, it takes some outgoing individuals to help make it work and lots of time to make the cards, but it's quite worthwhile for the end result. :)

If you do this fundraiser, please link to pictures! I did it pretty simply, I'd love to see how it can be expanded and fancified.

-Maria

Tuesday, June 25, 2013

Chi-ca-go! :)

Last week I went on a 2.5 day trip to Chicago for a school retreat for a group I'm part of. I went on this same trip last year (different activities) and it was pretty much equivalently TONS of fun. Chicago is a very multi-dimensional (literally and philosophically) city with lots and lots of things to do. Some of the super cool things we did:

1) Lunch at Gino's East
(C)mariakhan
fun picture i took while waiting

This was a relatively quick stop to eat famous Chicago deep dish pizza. The pizza was pretty good (and VERY different from 'normal' pizza) but what made this place interesting was the decoration. Gino's walls are covered in writing, giving it a very....unique (nicest way I can put it, haha) feel. One of our teacher sponsors was trying to get me to learn something from everything we did (it wasn't supposed to be an educational trip at all, but his point was that we should try to learn from everything we do). So when he asked me after this what I learned from lunch, after some thought I decided it was, "unusual things can be beautiful". The graffiti type look normally emanates more of a dirty-ish feel, but this look gave a very cool feel and looked beautiful in a sense.
One of the wall decors surrounded and covered in the writing 

2) John Hancock Observatory 
Currently my phone's home screen background!
While most people know about the Sears (aka Willis) Tower, this is the not so famous and not so tall counterpart also located in Chicago that is known for its amazing views. I've been to the Sears/Willis tower twice and while the skydeck is quite entertaining, the close to the shoreline view provided by this tower is worthwhile to see! I also got two flattened coins from this place for $0.51 each! The only use of pennies now :p

3) Chicago Food Planet Tour
This is probably my FAVORITE thing that we did and I am probably going to suggest everyone I know to do this when they visit Chicago. Basically, this was a 3-ish hour food tour in two neighborhoods of Chicago that covered 6 different restaurants with delicious food and a mini walking tour of the neighborhood and its beautiful architecture. I'm not a person who thinks FOOD all the time, but I really really enjoyed this. We did the Wickerpark/Bucktown tour, which included a hot dog from George's Hot Dog (I ate a pretty good salad instead :), amazing chocolate drink from Hot Chocolate,  an organic salad from Goddess and Grocer, thin crust pizza slice from Piece, a falafal sandwich from Sultan's Market, and freshly made ice cream iCream. Everything was really delicious! I think what made this even more fun is for someone who has lived near Chicago for a long time and has seen the main city plenty of times, this allowed me to explore a different part of Chicago in a super fun way. I tried making a slideshow of all these pictures but that kindda failed...sorry for all the scrolling!
Ice Cream from iCream-- it's blending right in front of you with liquid nitrogren!

Really pretty decoration at Sultan's Market!

One of the houses along the way had this in their front yard...memorable historical piece in  a quiet area :)

Cuckoo Clock like house that was really pretty! Along the walk

the cold chocolate drink from Hot Chocolate!  

4) Medieval Times Dinner and Tournament
This is the type of thing that I would probably never really think about going to unless it was this type of group trip. And it's also something I probably wouldn't enjoy as much if it wasn't the group I went with. This is dinner that takes place surrounding a humongous arena, where the main attraction is knights battling (on and off horses), with each group of seating representing a color and thus a knight. We were team YELLOW (yay, my favorite color! :D) and it ended up being so so So much fun. With the group of 22some students and 8 teachers, we did high school cheers for our knight, got crazy whenever it was time to root him on, and overall were extremely hyped about the whole thing. Our knight was literally smiling the whole time probably because we were SO loud for him....haha.
YELLOW KNIGHT!!! :D

Not my picture, but super pretty!


So that's a really small portion of all that we did in the two and half days; overall it was a really good trip with lots of bonding and fun! :) Some more random tidbits before I end off this post:

(self playing piano at the hotel....I was amused)

Aztec...something, but not a calendar, at the Field Museum! :) kindda cool
Last year my roommate who was one grade higher (now graduated) had written a note for our room  cleaning person, and I thought it would be a good things to do again, so I wrote this quick note! :) Not sure if they really care, but my roommates this year found the "Lord/Lady" part humourous :) classic teen touch into this rather info-based post :p

She is always a novelty; for she is never the Chicago you saw when you passed through the last time." — Mark Twain

Thursday, June 6, 2013

Ways to Hjiab-ify an Outfit

“O you Children of Adam! We have bestowed on you raiment to cover your shame as well as to be an adornment to you. But the raiment of righteousness, that is the best. Such are among the Signs of Allah, that they may receive admonition.” (Quran 7:26)

When I started wearing a headscarf 5.5 years ago, I didn't know a lot about "HIjab" much beyond the headscarf. Now, aware of more detailed criteria (of which, I am not here to debate) coming up with 'unique' ways to hijab-ify an outfit are necessary with American styles. So, how do I like to hijab-ify my outfit?

1) Add a cardigan
Cardigans came into fashion a few years back and can be found in all different price ranges and styles. Full sleeves cardigans are the perfect thing to wear with a short sleeved or short length shirt/dress. There are lighter material ones for hotter months and thicker knit style ones for the cold months. These are the perfect substitute for a full-sleeved undershirt and often times will look better than the shirt because it won't highlight the non-hijab-friendly parts and provide a loose top cover-up.


2) Dress + Pants

One of my favorite outfits!
I saw a friend do this a few years back and totally adopted the style, thinking it was pretty unique. But I was in Qatar on the way to Pakistan last summer and ALL the women were doing it. Although I received a few initial questions about why I was wearing a dress with pants (completely uncommon here in America) it's become more of my signature style at this point and looks nice! You can dress this up with dresspants or down with jeans, and it allows hijabis to wear shorter dresses.

3) Long Sleeved Shirts
Common option to hijab-ify, one that i don't use as often but I do have my share of black and white long sleeved shirts to wear under anything needed. My friend has shirts in every color and she works it really well by having lots of different underscarves. She'll contrast her undershirt with the dress/shirt and match her scarves with the color combo (for example, pink dress with green sequins might have a green undershirt, green scarf, and pink underscarf). Great way to not make the shirts looks out of place.

4) Sleeves
examples of sleeves
Especially for thicker shirts or hot days, cardigans and shirts can be cumbersome. Sleeves are a perfect replacement. You can find sleeves on several hijab websites, in many stores in Muslim countries, or just even cut off the sleeves of a full sleeve shirt, hem the edges, and enjoy! Surely a good item to have!

5) Pashmina/Rectangle Scarves
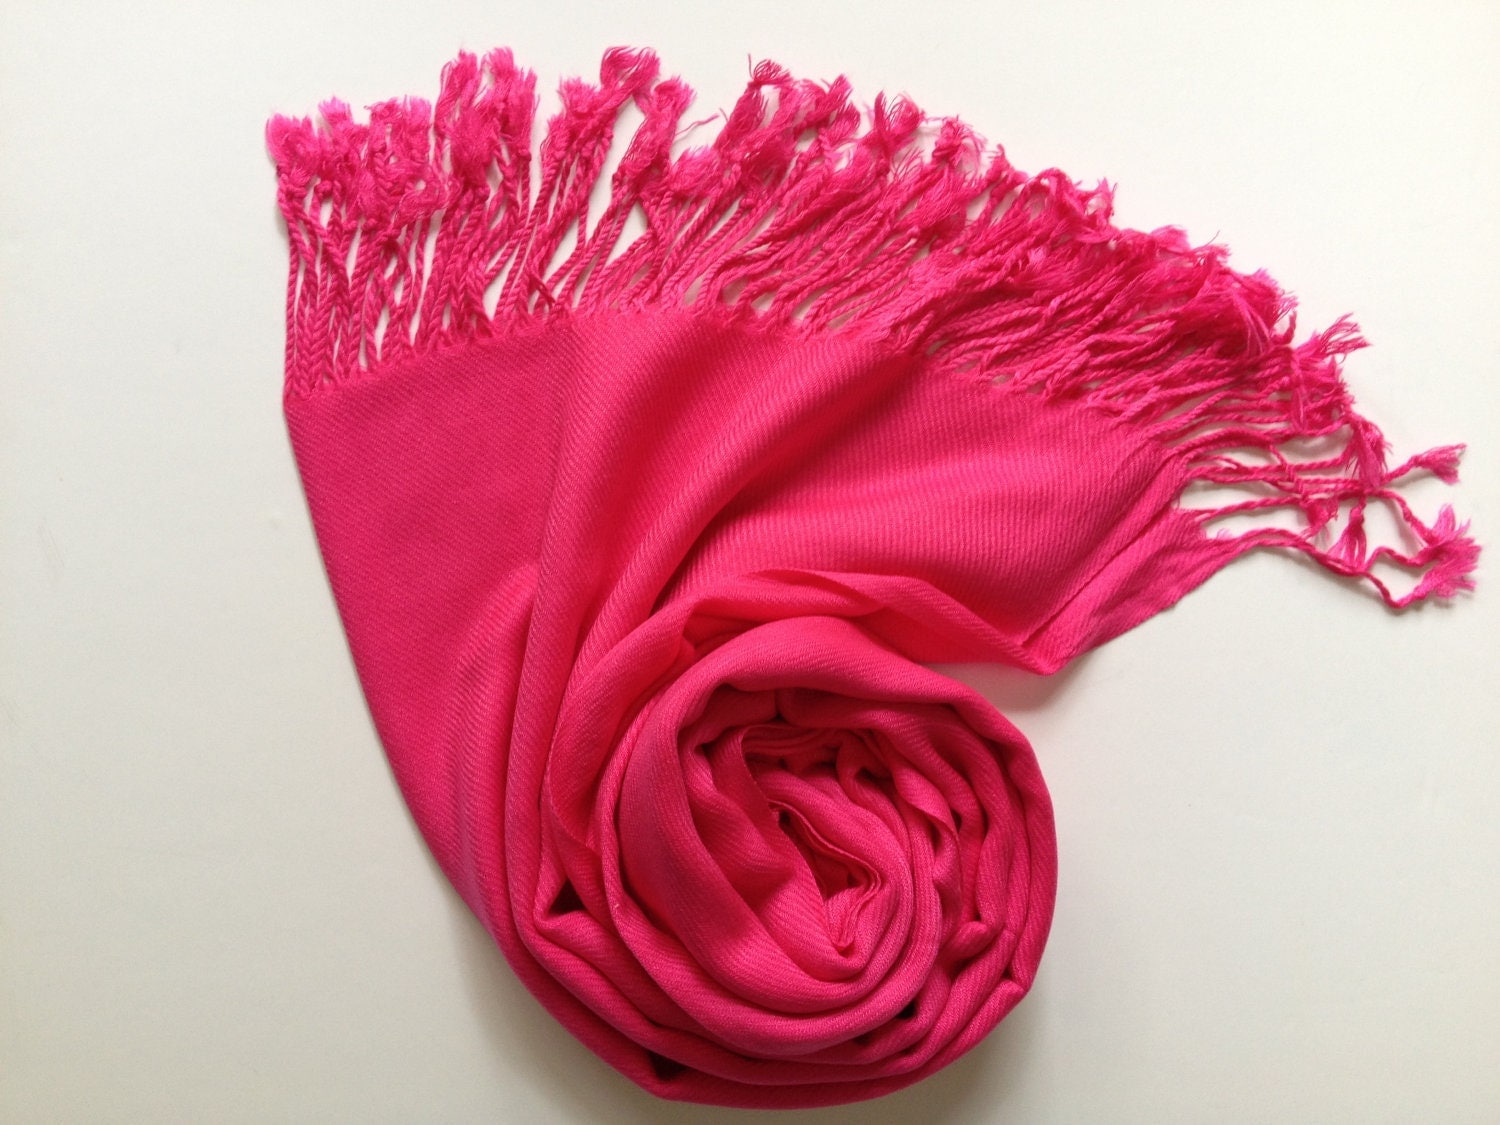
pretty hot pink scarf!
I've always preferred long, rectangle scarves over the square ones just because i found them easier. But they can also help by being big enough to provide extra coverage as needed- helping hijab-ify an outfit immensely. These can get hot if you're not used to it, but lighter fabrics are available. The nice thing is, you can buy these scarves for all price ranges at local shops because it is a common item. Square hijabs aren't as easy to find everywhere, although you can always buy square fabric and use that.

These are pretty simple things, but staring at my closet they are honestly the only major steps taken to hijab-ify my outfits. I think it helps though that most things I buy are long lengths, not tube-tops, and relatively loose. That makes hijab-ifying them a lot lot lot easier.

This is one thing where I'd love to hear what others do-- what's your staple way to hijab-ify your outfit? 

Wednesday, June 5, 2013

Top 5 Daily Use Apps

When I first got an iPod touch 3.5 years ago, I watched TONS of unboxing and app videos beforehand. Thus, upon the buying of the device, I was prepared with lists of what apps to download. Now, it's really hard to come across a useful list since I have a pretty good stack of regular apps that I use. But for newcomers to the smartphone world, this list of apps that I use on a regular basis may help!

*Sidenote- social networks are big for me, but I may do posts in the future that are centered around things like games, organization, camera, etc.*

*Sidenote #2 - the following are in no particular order*

1) Facebook/Facebook Messenger
Price: Free
Pros: It's the only decent Facebook app available. As far as messenger goes, FB messenger is probably the most universal messaging app, across all phones, and most people have an FB. Very fast, can share pictures/emojis/voice clips, and has desktop version obviously.
Cons: The main app is terrible - crashes, takes forever to load things, shows like half of your news feed, is super slow. Messenger cons- no video sharing
Other Notes: This is more of a necessity app than a good app. Like most people nowadays, I do 'surf' FB a lot (for various uses, school and personal) and this honestly is the only usable FB app. I've tried things like "Facely HD" and others, but this tends to work like 7 out of 10 times. Messenger, on the other hand, is pretty flawless and works wonderfully.

2) Twitter
Price: Free
Pros: Works super well, constantly improving with updates, easy to use
Cons: Recently gives me trouble while tweeting, but that may be an old device issue and not necessarily an app issue. Also logs me out ALL the time....very annoying
Other Notes: Again, a social networking app. I enjoy twitter for the little tidbits, even though people's complaining and live tweets can get annoying. The app does its job well though, for the most part.

3) Instagram
Price: Free
Pros: Works wonderfully
Cons: None?
Other Notes: Being a social network that started on smartphones probably helps this app be pretty flawless. I find this to be one of the most positive social networks and is surely used on a daily basis by me.

4) Feedly
Price: Free
Pros: Really pretty, fast, simple to use RSS reader
Cons: Logs you out sometimes = annoying
Other Notes: I used to use RssRunner (which is releasing a new app in July called Newsvibes) and switched to this recently. I think theyre focusing on their desktop version right now, which is annoying in a way, but having a desktop/Chrome app is NICE. It's pretty, has nice gestures and such, and makes reading 57 subscriptions easy

5) PicCal
Price: Lite: Free, Pro: $0.99
Pros: This is a photo-memory type of app, where you put a picture with a message (and optional tags) for every single day. They have updated it over the years to make it nicer and it makes for a really nice memory app. I would surely suggest it for someone as a memorable thing to look back at every now and then.
Con: There really is no proper backup for this, and unlike some other apps, there's not a website. I wish i could print a book from a year's worth of pictures, but that option is surely not possible right now. The app has potential which isn't being used, sadly.
Other Notes: If you like the idea but not the app, there's several on the market with the same function -- Photo-365, 365photos, etc. or you can just take a picture every day and upload it somewhere with the caption.

Those are my top 5 most used apps! Which apps do you regularly use? :)

Transition

And so begins the summer break blogging. :)

While i blog very intermittently, I read LOTS of blog. My current Feedly app has 57 subscriptions (many of which you can find in the right sidebar), but it's important to note that several of those blogs no longer post and I don't really want to remove them (just in case they return!).

There is a common thing among all the varieties of blog-- themes. Some are travel blogs, review blogs, parenting blogs, ...and the list goes on and on. While I would say my theme is "teenage life", it might be worthwhile to dip my little blog feet in some more thematic posting, things that my life centers around- School, Technology (specifically, Apple and Apps), Pakistani TV, nails (haha), hijab/Islam. So as I venture through these 2 months of possible boredom, I'll try to post some more thematic posts. We'll see how it goes!

:)